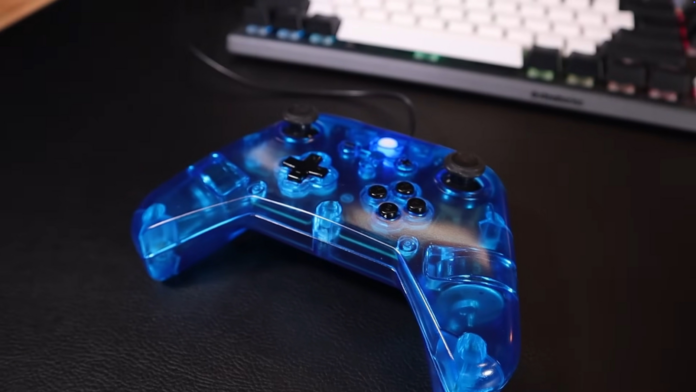
Summary DIY XWii controller merges Wii U gamepad design with modern features, making it ideal for gamers
Building the controller requires electronic components, PCBs, 3D-printed parts, and soldering skills
McKenzie’s open-source project provides detailed instructions to assemble the controller successfully
Daniel “CNCDan” McKenzie has brought back a console gaming favorite. He designed a DIY gaming controller that features the ergonomic and D-pad design of the Wii U gamepad, even though new controllers have changed the layout. The XWii gamepad brings you the best of both worlds, melding the Wii-U gamepad with the ergonomics of an Xbox One controller. This design gives gamers plenty of space to play and has modern features like rumble motors.
The DIY XWii controller features modern Hall effect joysticks and an RGB status indicator. It includes a 3D-printed housing, shoulder buttons, and trigger buttons. The great news about this project is that, like his Steam Deck-inspired NucDeck, McKenzie has made the DIY XWii controller open source and provides all the info you need to make your own.
Related 5 SBC and microcontroller projects that go hard There are projects and there are Projects. Here are some SBC and microcontroller projects that truly push the limits of the DIY gadget hobby.
What you’ll need to build your own XWii controller
To construct your DIY XWii controller, you’ll need various electronic components, fastener hardware, and 3D-printed parts. If you have a 3D printer, you’ll naturally be able to make these 3D-printed parts yourself. If not, most companies that manufacture custom PCBs can also handle the 3D printing for you.
You should also have basic soldering skills or know someone who does. All the wiring inside the controller is secured via soldering, not an FFC cable. McKenzie says this makes the project friendlier for beginners to such DIY undertakings. So, on to the bill of materials.
Custom PCBs required for the project
McKenzie designed two custom PCBs for the controller. You can get these manufactured from companies like PCBWay or JLCPCB. All the required design files are in the project’s GitHub repository. You’ll need:
1x front PCB, using the ENIG surface finish. PCBWay refers to this as an immersion gold finish,
1x rear PCB
Of course, you can also modify the PCB design before sending it into production. You’ll need familiarity with KiCad to do this, but one benefit this could provide is allowing you to get a preassembled front PCB, saving you from having to solder the microcontroller and other electronic components into place carefully.
3D-printed components
The repository contains both STL and STEP files for printing the two halves of the housing, the shoulder buttons, and the triggers. STEP files allow you to customize the parts. McKenzie offers guidance on printing these parts on an FDM printer to ensure a successful build.
McKenzie printed the parts on his own FDM printer and ordered the pieces from PCBWay printed on a resin printer. This produces a much more polished, professional-looking housing than you could accomplish on an FDM printer.
The instructions include positioning the part, rotating it, and adding supports to avoid print failures or bad adhesion issues. McKenzie also provides guidance on where to position the Z seam for each part. Since the designer doesn’t note what layer height to use, you should be fine choosing your preference based on how prominent you want the layer lines to appear.
Fastener hardware for the XWii controller
Obviously, you need to fasten the electronics in place and assemble the buttons, triggers, and housing. McKenzie lists the following hardware you’ll need to purchase for assembly:
5x M3x5x5 threaded inserts
2x M2x3.2×3 threaded inserts
3x M2x3.2×4 threaded inserts
5x M3x8 SHCS screws
6x M2x4 SHCS screws
All of these are readily available at your local hardware store or Amazon.
Electronics components you’ll need
Finally, you need the controller’s guts. These components can be found at AliExpress and other electronic component outlets.
1x Switch lite button set
1x Switch lite membrane set
2x PS5 Hall sensor joysticks
1x Xbox rumble motor (pair)
2x PS4/5 Trigger Springs
2x 3x1mm Neodymium Magnets
1x ATmega 32U4 44TQFP microcontroller
1x 6028 RGB LED
1x WS2811 IC
1x USB Data Cable (You’ll remove one end of the cable, so just be sure it has the proper plug for your console or gaming device on one end.)
Assembling your new DIY controller
Close
McKenzie details the assembly of the project on the GitHub repository and demonstrates some of the steps in the video above. The trickiest part will be soldering the connections to the PCBs, but the detailed schematics will guide anybody with basic soldering abilities to complete the project successfully.
Close
Controller performance and next steps
McKenzie is still refining the XWii controller but has already performed remarkably well. While he doesn’t have sophisticated testing equipment, he did find that its latency was very close to that of an official Xbox controller.
The current design is wired, but McKenzie hopes to develop a wireless version. Considering it’s a DIY game controller on par with manufactured models, it’s already a fantastic accomplishment. Find all the resources you need in the project repository on GitHub.


